
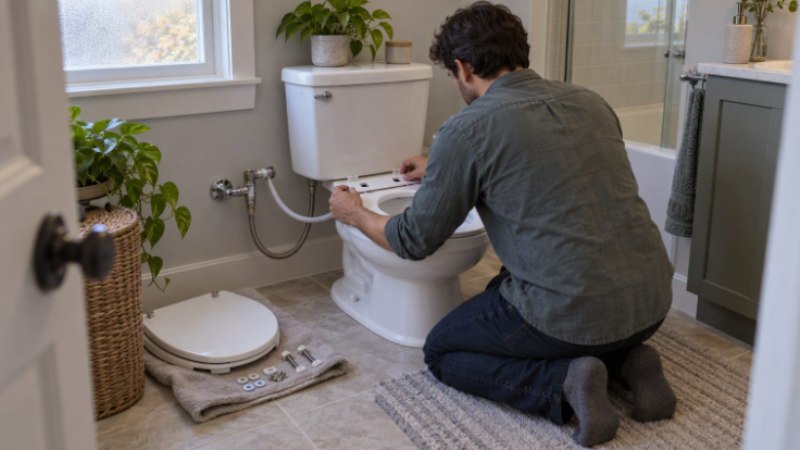
Installing a bidet seat can change how your bathroom works while leaving the footprint and finishes alone. The catch: the model has to fit your toilet, and it must reach the existing water connection without straining the hose. The project uses the toilet’s existing seat-mounting holes and the cold-water line that fills the tank.
You won’t be tearing anything out. Still, a few things decide success: toilet geometry, clearance, the condition of your plumbing, and whether power is available. Renting? Check the lease before you touch a water connection, and stash the original seat and its hardware somewhere safe. The best starting point is the two mounting holes behind the bowl.
Check the Toilet Before Buying or Unboxing the Seat
Measure the bowl and mounting area
Round bowls have a shorter front profile than elongated bowls, but the label alone doesn’t establish fit. Measure from the centers of the seat-bolt holes out to the bowl’s front edge. Next, check the spacing between the bolt holes.
Before you open the packaging, lay every measurement against the chosen model’s installation manual. That includes the space needed to slide the seat onto its mounting plate without striking the tank or raised rear porcelain. Also check the gap between the mounting holes and the tank. You want enough room for hands and tools beside walls or cabinets, and around the shutoff valve.
| Check | What to inspect | Installation decision |
| Bowl shape | Round or elongated profile | Match the seat to the bowl dimensions |
| Mounting area | Bolt spacing and rear clearance | Confirm the plate can lie flat |
| Water access | Shutoff valve and tank connection | Resolve seized or damaged parts first |
| Power access | Outlet location and cord reach | Choose a suitable model or consult an electrician |
Inspect the water and power connections
Test the shutoff valve before you loosen any hose. It needs to close the supply completely, and you have to be able to reach the tank’s threaded inlet. If parts are seized or damaged, repair or replace them before disconnecting the toilet supply.
For an electric seat, check that the cord reaches a suitable nearby outlet with no extension cord involved and no crossing of a walkway or wet area. A nonelectric seat or attachment skips this requirement entirely. No electrical outlet available for the installation? Then go with a nonelectric model or attachment.
Watch for one common issue: the T-valve splitting the water line has to match your tank’s inlet thread, and a seized wall valve can turn a one-hour job into a plumbing call. When you’re ready to plan the work, how to install a bidet walks through the process step by step, from closing the valve to leak-checking the finished connections.
How to Install a Bidet on the Existing Layout
Whenever your product manual differs from these general instructions, the manual wins. Grab an adjustable wrench and screwdriver, plus the supplied fittings, before you start.
- Prepare the area. Place a towel or shallow container under the tank connection. Close the toilet’s shutoff valve without forcing it.
- Relieve pressure. Flush and let the tank empty as much as possible. Expect some water to remain in the hose.
- Remove the existing seat. Undo the seat bolts and keep reusable hardware together.
- Position the mounting plate. Center it over the existing holes and insert the supplied hardware. Tighten evenly, without distorting the plate or damaging the porcelain.
- Disconnect the supply hose. Detach it at the tank connection, not automatically at the wall valve.
- Install the supplied T-valve. Position its washer as directed and start the threads by hand. Follow the manual’s instructions on thread tape; don’t add it automatically.
- Reconnect the lines. Attach the toilet supply and bidet hose to their designated T-valve ports.
- Mount the seat. Slide or lock it onto the plate. Confirm that it is centered and clears the tank.
- Restore water slowly. Open the shutoff gradually while watching every connection. Stop if water appears.
- Complete the final check. Dry the fittings and look for fresh moisture. For electric models, connect the power as directed after checking for leaks. Test the controls at low pressure, and recheck the connections later.
Overtightening damages washers and threads.
How to connect a bidet seat water line
The supplied T-valve generally attaches to the tank’s fill-valve inlet. The toilet supply reconnects to one port, and the bidet hose connects to the other. Start every connection by hand, and place the included washers exactly as specified. Keep flexible hoses free of sharp bends. If your manual specifies a different layout, follow it instead.
Solving Fit Problems and Slow Leaks
How to install a bidet seat on a one-piece toilet
On a one-piece toilet, look for concealed or restricted mounting access. Some models need compatible top-mount hardware because you can’t reach underneath. Compatibility still comes down to seat and toilet geometry. Never drill porcelain or improvise fasteners.
Bidet seat installation for French curve toilets
French curve toilets raise the porcelain behind the bowl, which can block the rear housing or mounting plate. Compare the model’s rear-clearance requirements with your own measurements. If the housing touches the porcelain or the seat won’t lock onto its plate, it isn’t a proper fit.
Leaks and unstable seats
To correct a slow leak, shut off the water and flush. Dry the connection to locate fresh moisture before disassembly. Check whether the washer is missing or pinched, verify its alignment, and inspect for crossed threads. Reassemble by hand before applying modest tool pressure as directed in the manual.
Water at the wall valve or a cracked fitting means stop and call a plumber. The same goes for a leaking fill-valve body. If the seat moves, center the plate and tighten it evenly, then confirm the seat fully engages its locking mechanism.
Practical Questions Before You Commit
Can a bidet seat fit a regular toilet?
Yes. Many standard two-piece toilets accept compatible seats that use the existing bolt holes and toilet water line. Fit depends on bowl shape and mounting dimensions, including rear clearance. A homeowner comfortable with basic hand tools can often finish the job; hire a plumber for damaged valves or inaccessible connections.
Can an electric model work without a nearby outlet?
An electric seat needs the power connection its manufacturer specifies. Without an accessible outlet, choose a nonelectric model or have a qualified electrician assess whether they can install a permanent grounded bathroom outlet. Don’t operate an electric seat on an improvised power supply.
Can a bidet connect to a sink?
A standard bidet seat normally connects to the toilet’s cold-water supply, not the sink. Some specialized products allow manufacturer-approved sink or hot-water connections. Never improvise a hose across the room or use an adapter the manual doesn’t specify.
Should you wipe before using a bidet?
No, wiping first isn’t universally required. Wash according to the instructions and pat dry if needed. A 2023 review in the International Journal of Women’s Dermatology concluded that bidets can provide an alternative to toilet paper or wet wipes for people with perianal dermatological conditions. It also reported improved toileting independence and cleanliness in a stroke rehabilitation study of electric bidet users. That finding isn’t medical advice for treating an existing skin condition.
What downsides come with a bidet toilet?
The main drawbacks are compatibility limits and outlet requirements for many electric models. You’ll also need to clean around the mounting plate, and incorrect connections can leak. A 2023 case report in the Journal of the Anus, Rectum and Colon associated an anorectal aphthoid ulcer with five or more strong washes daily, each lasting at least one minute. Tsunoda (2023) reported this finding. Tsunoda (2023) reported that the lesion healed five weeks after bidet use stopped. Described a single case, not a typical outcome of ordinary washing.
There is no universal plumbing fee. Charges depend on local labor rates, toilet access, valve condition, and any needed plumbing repairs. Separate electrical work affects the total too. Request a written scope identifying what the quote covers.
Preserve the Bathroom, Then Verify the Details
Your bathroom’s design survives this project when the seat fits the toilet and the connections work with the existing setup. A model that needs improvised hardware isn’t a shortcut around a compatibility problem. Careful assembly matters more than forcing an unsuitable seat into the available space. Keep the manual and original seat hardware for future adjustments or removal. And after the toilet has been used once more, check the dry fittings again.